Operator registration guide
Before setting up a Operator, explore the overview.
Operator types
Operators can register online without permission, and provide infrastructure for the benefit of Networks. Once registered, Operators can join / create a DAM and get assigned to Networks through installation, i.e. adding a live Network to a DAM.
There are several Operator types, depending on the goals:
- Independent operator (permissionless access): Discover new opportunities in the marketplace. You need to create own DAM. This DAM will represent your service on the platform and allow you to manage assets and rewards.
- Affiliated operator (permissioned access): Join as a node operator of a specific distributed network. You need to get invited by a third party DAM and accept the role.
Below you will find a step-by-step guide on how to register as an independent Operator.
1. Launch your DAM
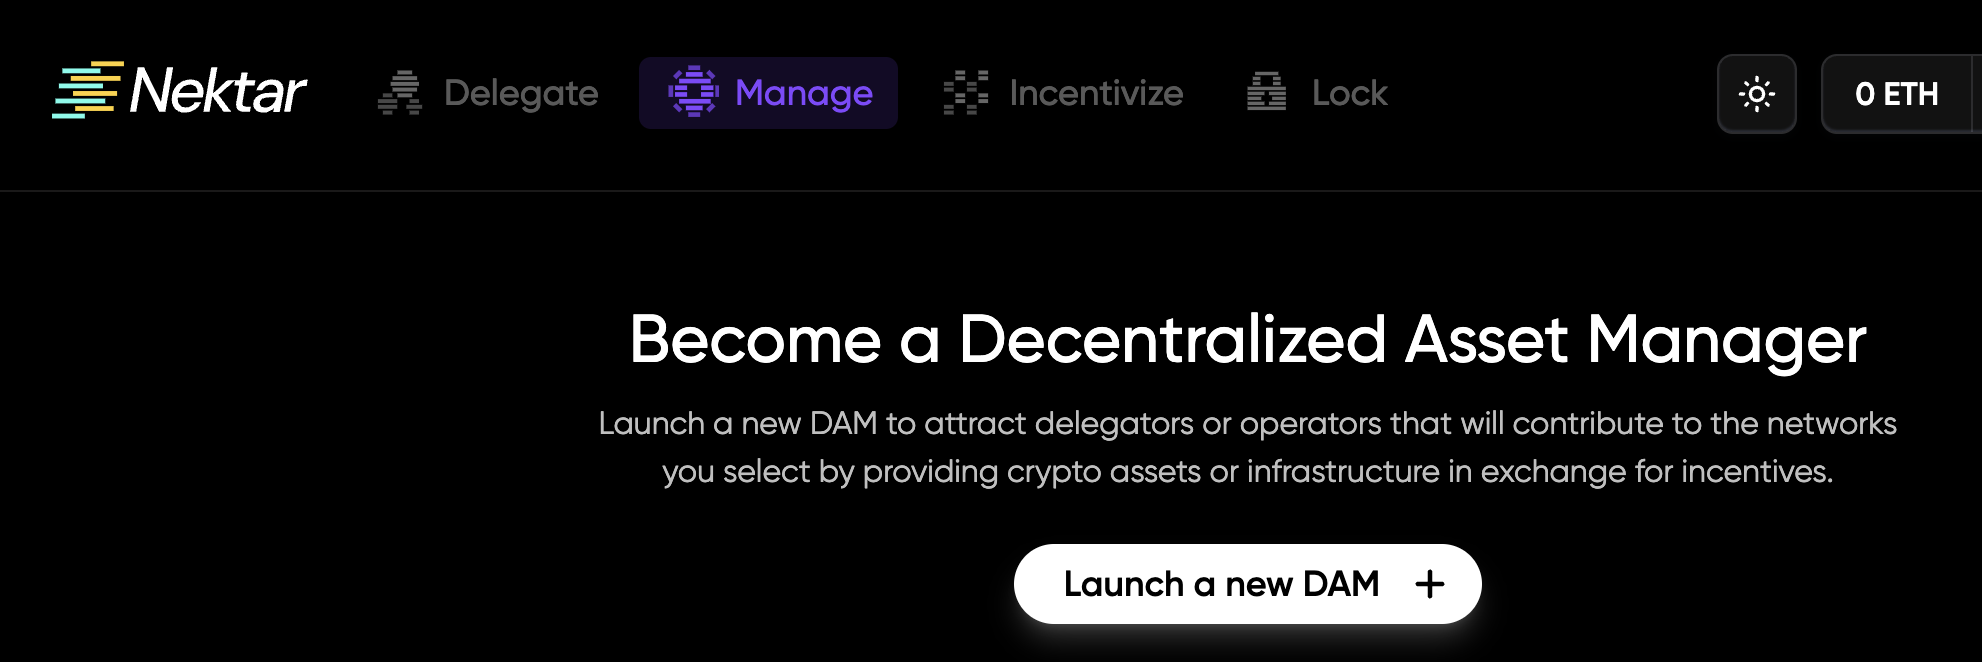
- Visit Nektar app at https://app.nektar.network
- From the Manage tab, select Launch a new DAM button.
2. Define DAM basics
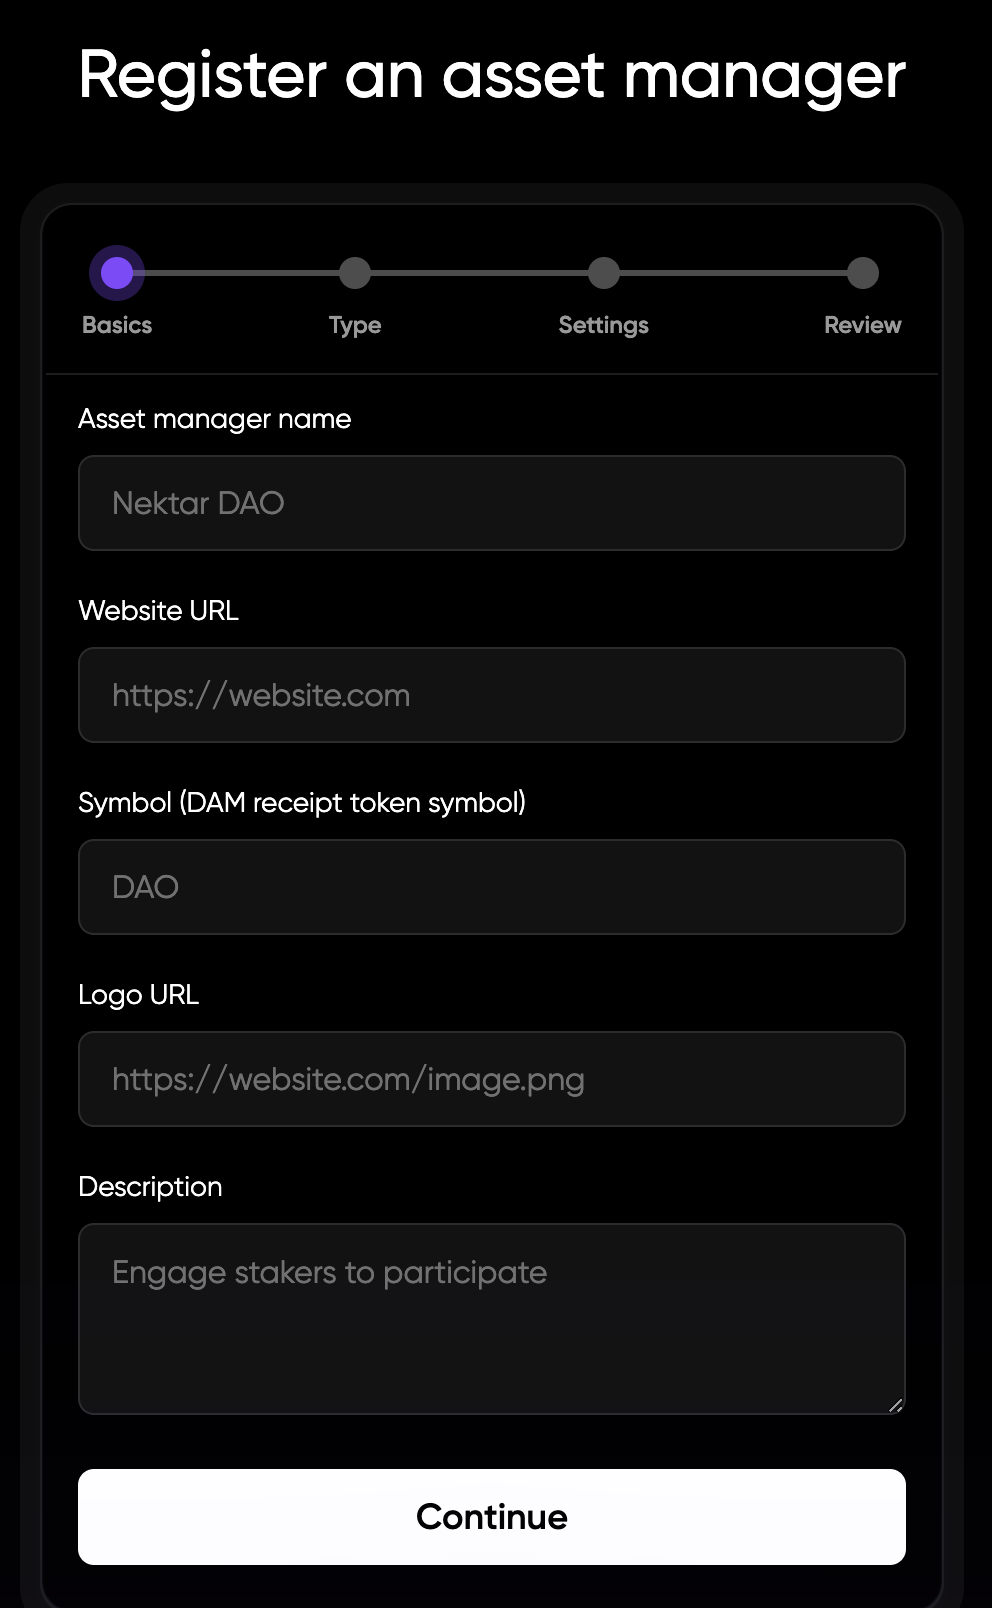
- Asset manager name: Set the name of your asset manager.
- Website URL: Add a link to your project’s website.
- DAM receipt token symbol: Set the symbol for your DAM receipt tokens (e.g., deTKN).
- Logo URL: Provide a logo URL for your Operator’s branding.
- Description: Provide a brief description of your Operator’s hardware capabilities and the services you offer.
3. Specify DAM type
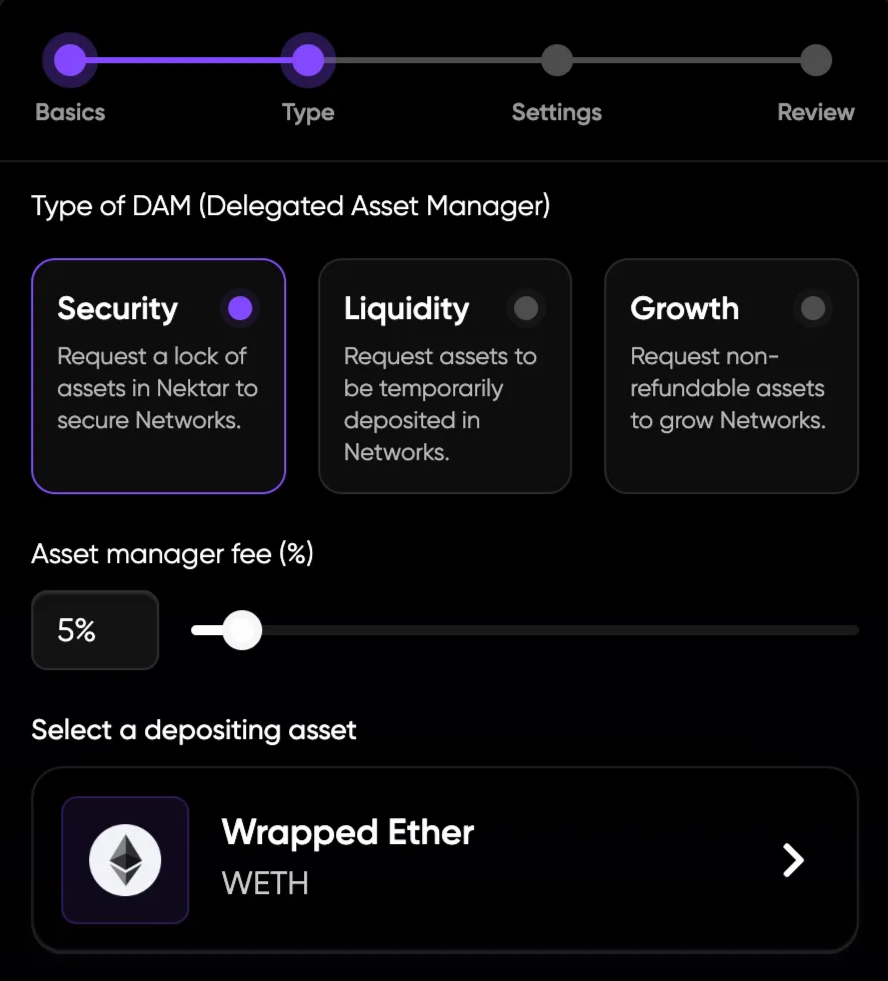
- Type of DAM: Your use case category, per required asset flow scenario. It will need to match a Network type for its installation to be possible.
- Asset manager fee: Define the percentage fee for asset management, with the option to set it at 0 if applicable. It will be charged when delegated funds are deposited into the DAM.
- Depositing asset: Choose the ERC-20 token that Delegators will deposit.
4. Configure DAM settings
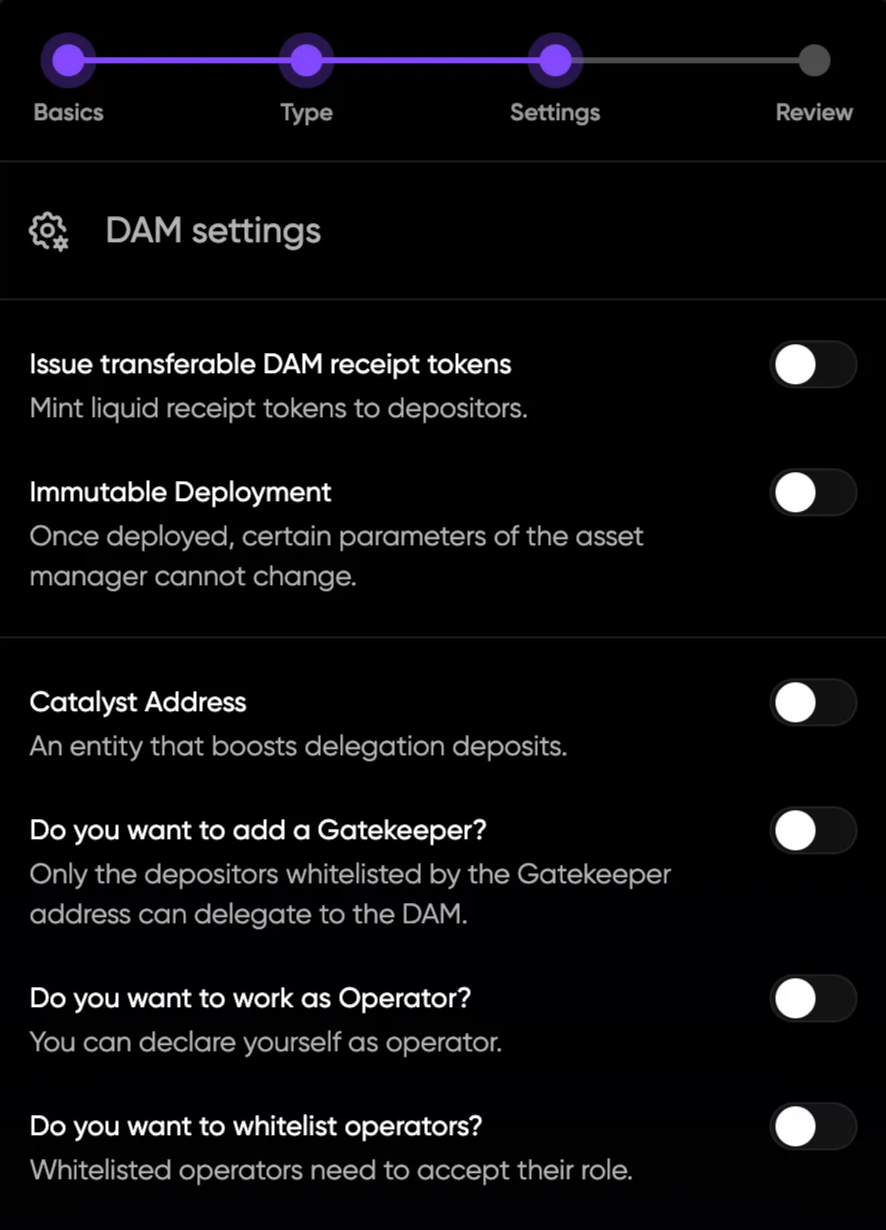
- Issue transferable DAM receipt tokens: Enable this option if you want to issue liquid receipt tokens to Delegators, representing their share of the DAM.
- Immutable deployment: Enable if you want certain aspects of the DAM (such as parameters) to be unchangeable after deployment.
- Catalyst address: (Optional) Provide a Catalyst address that can boost delegation deposits.
- Gatekeeper address: (Optional) Add a gatekeeper address if you want to restrict deposits to a whitelist of approved addresses.
- ‘Do you want to work as Operator?’: Declare yourself an Operator, if you want to act as an independent operator.
- ‘Do you want to whitelist operators?’: Optionally you can set to only accept whitelisted operators. Suitable to onboard affiliated operators.
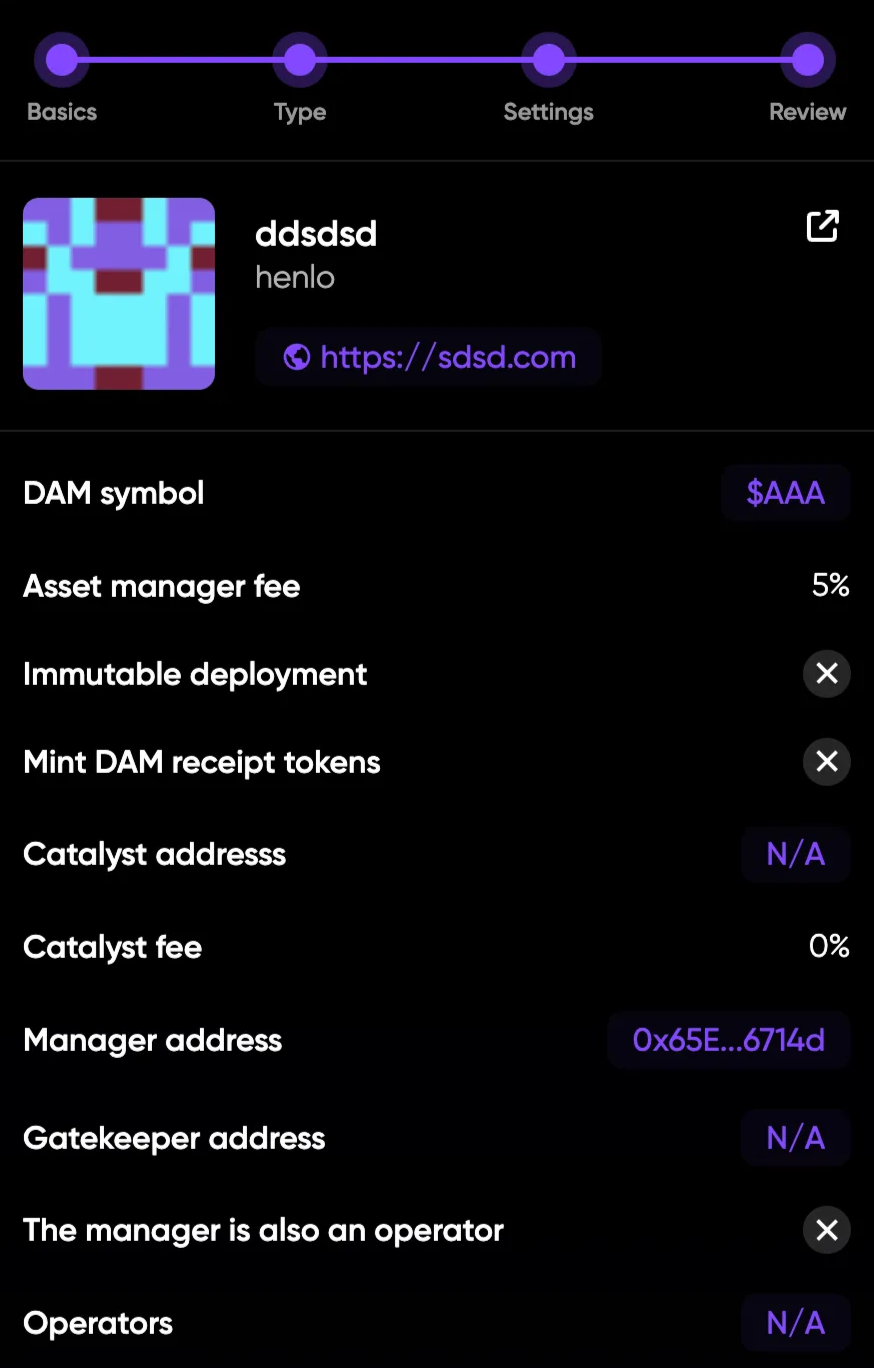
5. Confirm and deploy
- Review all the information you’ve entered, including the DAM Symbol, fees, and any additional settings.
- Confirm that everything is correct, and click Confirm & Deploy to register and deploy your DAM.
What happens after registration?
- Contract deployment: Once a new DAM is registered, its contract is created and deployed on-chain using a factory template.
- Network selection: DAMs can select Networks based on the services required and rewards.
- Network installation: DAMs can add Networks, so they can access delegated liquidity and compute resources.
- Network confirmation: Installation needs to be confirmed on the Network side.
- Operate infrastructure: Provide services for the Networks you support by running nodes, validating consensus, lending hardware, or other activities.
- Delegated participation: Delegators can start contributing assets based on the established terms.
- Rewards distribution: Rewards will be distributed according to the configured parameters.
Ready to join?
Visit Nektar app at https://app.nektar.network and click Manage tab to as an Operator, configure your DAM, and start supporting Networks today!